Turning an image into a line drawing in Photoshop is not an easy task but I can assure you that the cease result is very pleasing and can raise the fashion and appeal of your eCommerce site. To make a line cartoon of a photo doesn't require knowledge of professional person cartoon. Line drawing an prototype is a procedure of tracing the lines of a photo that becomes easy with adobe Photoshop cc.
Today I am going to present yous a Photoshop tutorial on how to turn a photograph into a line drawing. The Photoshop tool I am going to use in this tutorial is "Pen Tool". And then if you don't know, "what is a pen tool?", I would propose y'all learn most this tool first and then proceed this tutorial. I know you lot all are intelligent and presume to know about the pen tool enough. And then allow'south get started…
I have divided this tutorial into ii major parts to brand the process a little bit easy to sympathize.
Part 1: Prepare the Paradigm
First thing first and that is preparing the photo to execute the line describe process on information technology. To prepare your image, insert it into Photoshop software showtime. To insert an paradigm but drag and drop the prototype on the software workspace or go to the top Menu bar and insert your photo.
Afterward inserting the image into adobe Photoshop cc, we need to Duplicate and create three new layers apart from the original one. But before creating a new layer nosotros need to tweak our image a picayune bit and set some modest issues like hue and saturation.
Nosotros tin can't allow much grain and blurriness to our photo because these will create bug in drawing paths after. So if your paradigm contains grains you can read our " How to set grainy photo " article to prepare the issue.
If you are still reading this so I assume yous accept fixed your grainy photos and interested to learn the line drawing.
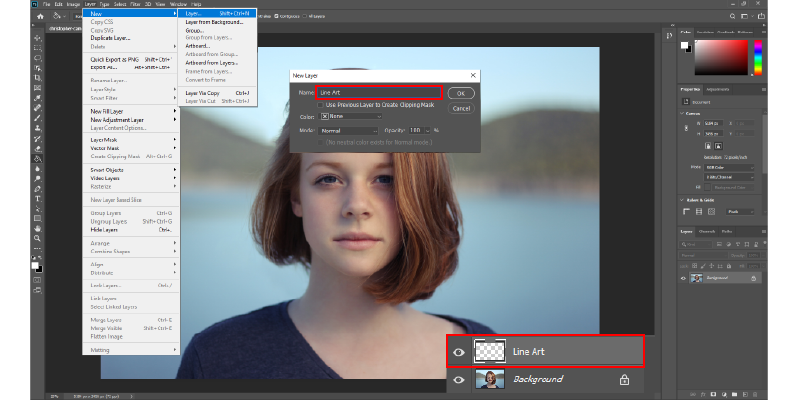
Now that you fixed all the issues, we can create iii duplicate layers of the original prototype. To create a duplicate layer press Ctrl+J and you lot volition get a duplicate version of your image.
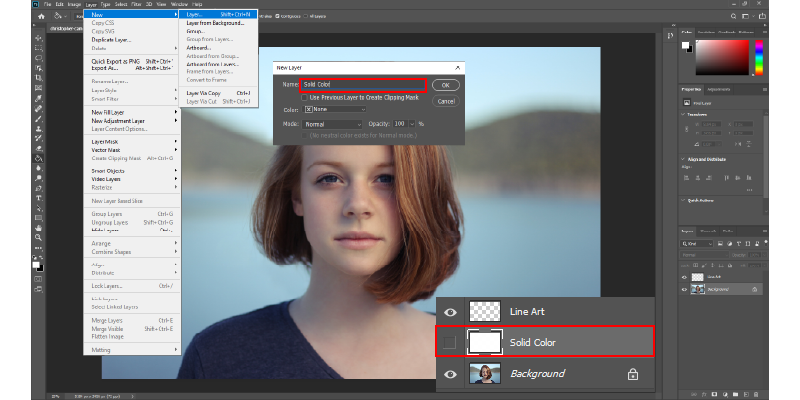
We will gear up the name of the commencement layer to "Line art" and create a second layer with a solid white color and telephone call information technology Background . Now we will see three-layer one is the original and the other two are the "Line Art" and "Background" that nosotros created merely now.
We volition keep the Visibility Off for the layers " Line art " and the solid white layer " Background "
Now we are done the image retouching process and preparing the paradigm for the line drawing.
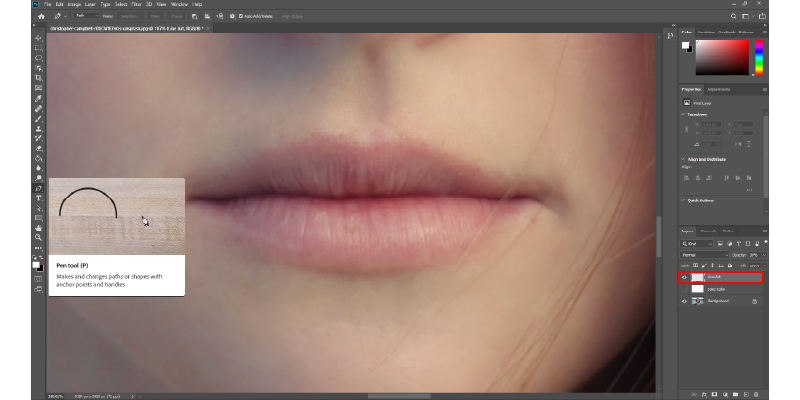
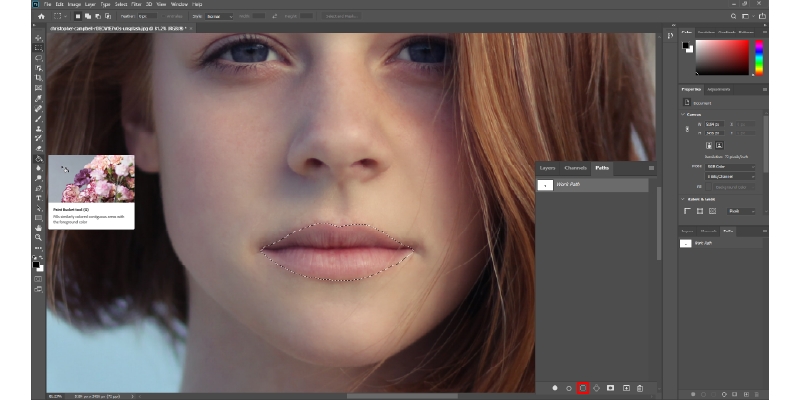
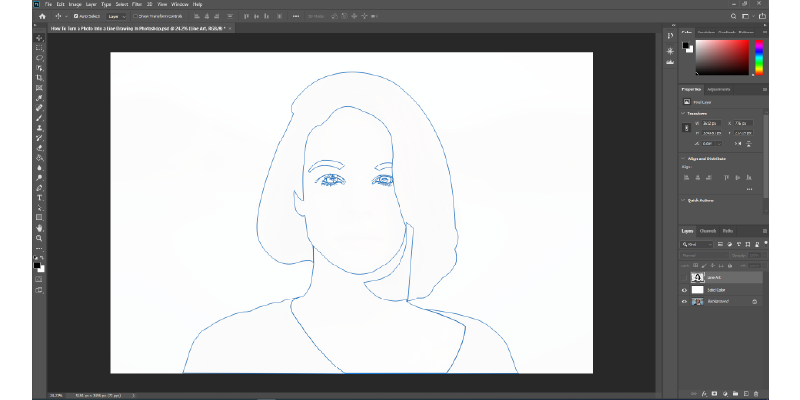
Create a line drawing from the photograph is like an artist doing a sketch on the newspaper. The line cartoon image editing process needs patience and eye for attending to detail. The perfect way to outset the line drawing is from the focus signal of an prototype. The focus bespeak varies from photo to photo. For this article, I am using a headshot of a model and in my photo, I will showtime cartoon paths from the lips.
To start creating the lines or paths select the " pen tool " and set information technology to Create New Work Path. Now start drawing the line around the edge of the lips and always pay attention to the curves and angles because these minor things tin heighten your line drawing and produce an outstanding output.
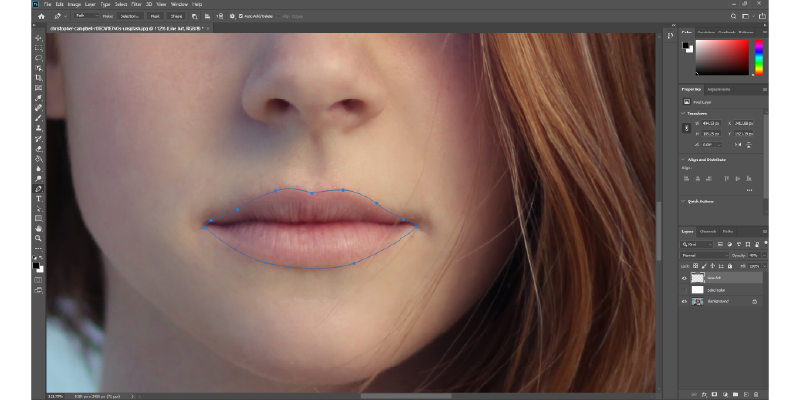
Effort to draw short paths because curt lines can make your line drawing more than accurate than big lines. So as I am cartoon lines over lips I am using a short path to get the angles and curves perfect.
After completing the line drawing over the lips now create a shape layer. Go to path menu (as per the photo) and create a path pick
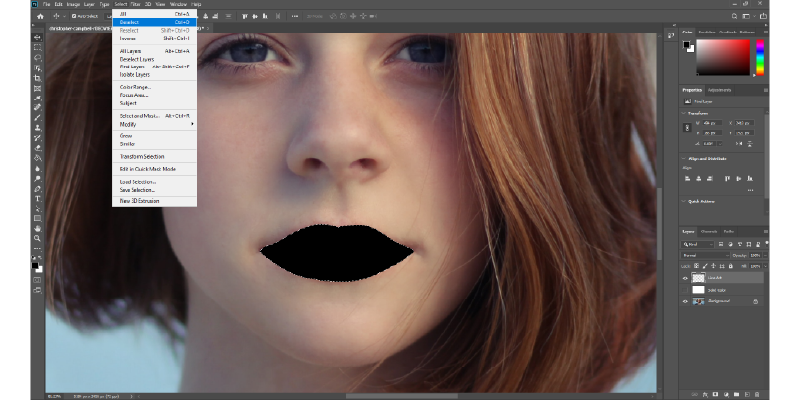
At present select the pigment bucket tool and create a shape to the selection and deselect the choice.
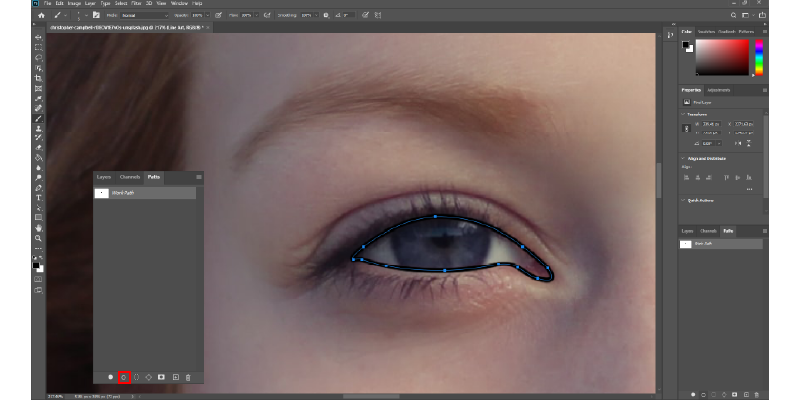
Permit'due south get to the optics and create a line cartoon. Merely select the brush tool to select the castor stroke.
At present become to the path menu and select stroke path with the brush.
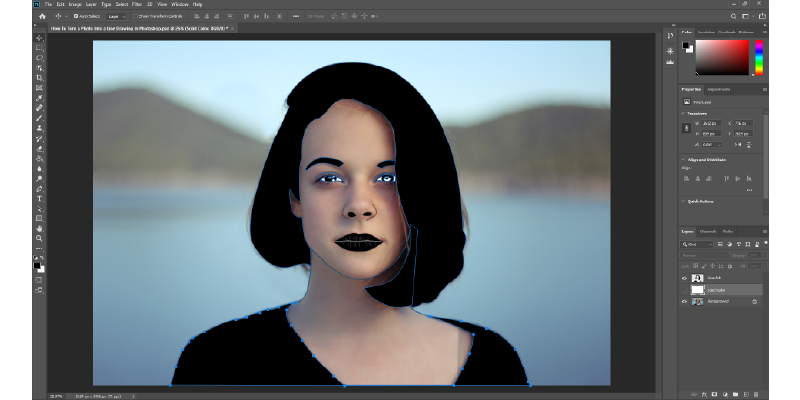
Follow the same steps to draw the full prototype. later on completing the full image turn the white layer on
Select the line art layer and turn the visibility off and delete the piece of work path line.
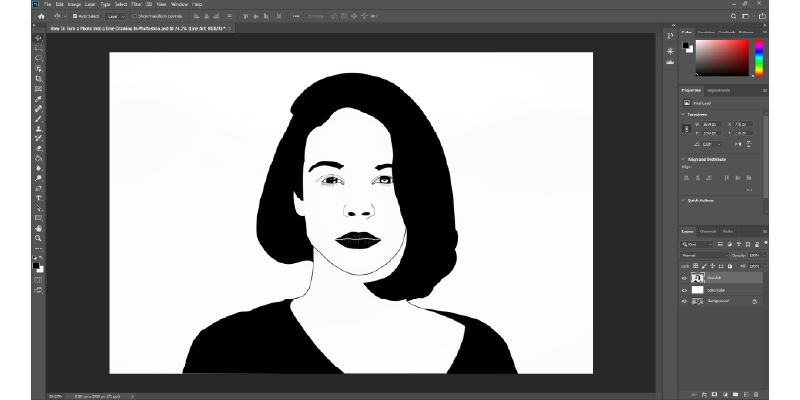
At present turn the visibility on and Blast!! here is your line fine art drawing
Play with different pen tools and try different shapes, lines that lucifer with your photo. Use the stroke path or the fill path where y'all demand and complete the line cartoon co-ordinate to your requirements.
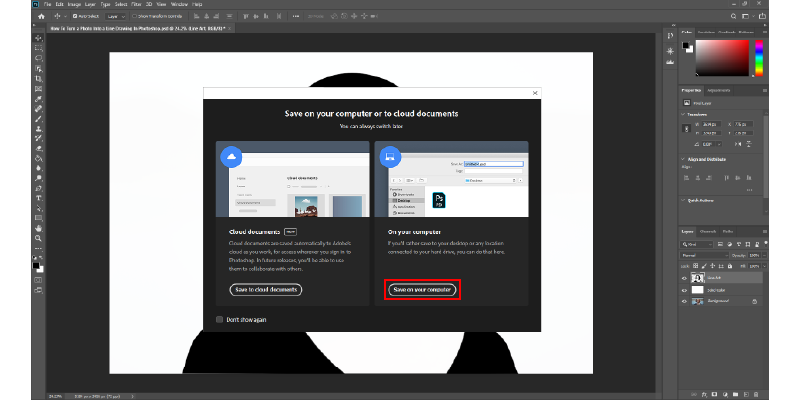
After finishing save the image and there y'all become. Your line cartoon is ready to use and impress your viewers.
This is the final line drawing an image that y'all volition get afterward following this tutorial.
Here is the video tutorial for better understanding
Emma Rivett
Author
"Emma Rivett is a brand photographer and copywriter who has a strong tendency to ready, alter and teach. Her photographic works were published in Uppercase, Travel + Leisure, Gayot Guide, Paula Deen Cooking, Design Guide, the NHOME Magazine, Urban Dwelling, etc. Helping creative businesspeople create an online make and PS"
rowellsude1982.blogspot.com
Source: https://theclippingpathservice.com/how-to-turn-a-photo-into-a-line-drawing-in-photoshop/